
PHOTO STYLING TO ATTRACT & ENGAGE YOUR CUSTOMERS... PART 2
Blog
Styling your images to create balanced, emotive and beautiful images of your pieces is one of the most powerful sales tools available to handmade sellers in terms of attracting and engaging with customers. Your imagery should be an extension of your branding and should help tell your brand story.
In Part 1 of this two part blog series, jewellery photographer, Karen Young shared some tools that you can use to position items in the frame in a visually pleasing way that elevates, not overwhelms the main focus of the image (i.e. your beautiful jewellery). By putting these composition tools into practice, we now have some techniques and tools that help us to place items in the frame successfully. In Part 2 of this series , Karen dives into the building blocks of styling and how to choose those all important props and backgrounds to create an on-brand visual identity online.

The Building Blocks of Photo Styling
So hopefully you can see that Photo Styling is about more than just choosing props. Styling is all about positioning those props in a visually pleasing way and using those additional items to elevate and emphasise the main focus of the image. There are 4 key building blocks when it comes to composition and styling. These are:
1. LINES AND SHAPES
2. TEXTURE
3. LAYERS
4. COLOUR
Selecting an optimum blend of these 4 building blocks for your brand will really help you style your products successfully.
1. Lines and Shapes
a. LINES
Creating lines and shapes through your styling is incredibly powerful. As we discussed in Part 1 of this blog series, Leading lines is one of the fundamental composition techniques in photography. Although it often pertains to landscape photography, using leading lines works really well for product photography. Lines lead the eye through a photograph and guide the viewer around the image, the main focus of the image, and the supporting elements. So why are lines so important?
Lines create movement, motion, fluidity and rhythm
They create visual interest and patterns which adds impact to the image
You can find or create lines in both the jewellery and props. Some lines might be organic, but most will be created by the composition.


In the lightly styled image above, there is a very subtle line that leads the eye through the frame and past the feature item (the Cherry Blossom Ring). Without the line, the image would feel a little bit flat. The line just adds a little bit of interest.
b. SHAPE
Shape is any two-dimensional representation of something we recognise. They appear everywhere and are often one of the first things we notice even without realising.
Shapes exist organically in jewellery and props, but can also be created in placement and composition i.e. a group of elements or subjects. The human eye is very clever, and often creates shapes even if not all of the shape is in the frame. So what is shape?
Shape is any two-dimensional representation of something we recognise. They appear everywhere and are often one of the first things we notice
Shapes exist organically in jewellery and props but can also be created in placement and composition i.e. a group of elements or subjects.


In the example above, a triangle shape has been created using the peony petals. Even though not all of the petals are in the frame, the eye automatically creates this shape in our mind. And, it also is visually pleasing due to the Rule of Odds outlined in Part 1 of this blog series.
Using your props to create shapes can really create impact in your images.
And lines and shapes work well when combined to create impactful images.


You not only have the oval shapes from the rings lying flat, you have the hexagon shape from the tile (your mind automatically completes the shape even though only a small amount is in the shot), and you also have triangles, leading lines and a circular shape created by the props surrounding the trio of rings.
2. Texture
Often if an image seems flat and a little uninspiring, it is because it is missing texture. Adding texture to your image is perhaps the single biggest thing you can do to add contrast and interest to your image. So why is texture so important when it comes to styling?
Texture emphasises and add interest, and conveys emotion
Texture and patterns can be used in your focal subjects to strengthen them and increase their power in the frame
The textures you add should ALWAYS be in proportion to the subject - if you have small delicate jewellery you want to keep your textures small and subtle, for larger pieces you can be a bit more bold with your textures
You also want to avoid adding too many textures or patterns where it becomes overwhelming - jewellery is small so you don't want the texture to overwhelm it.


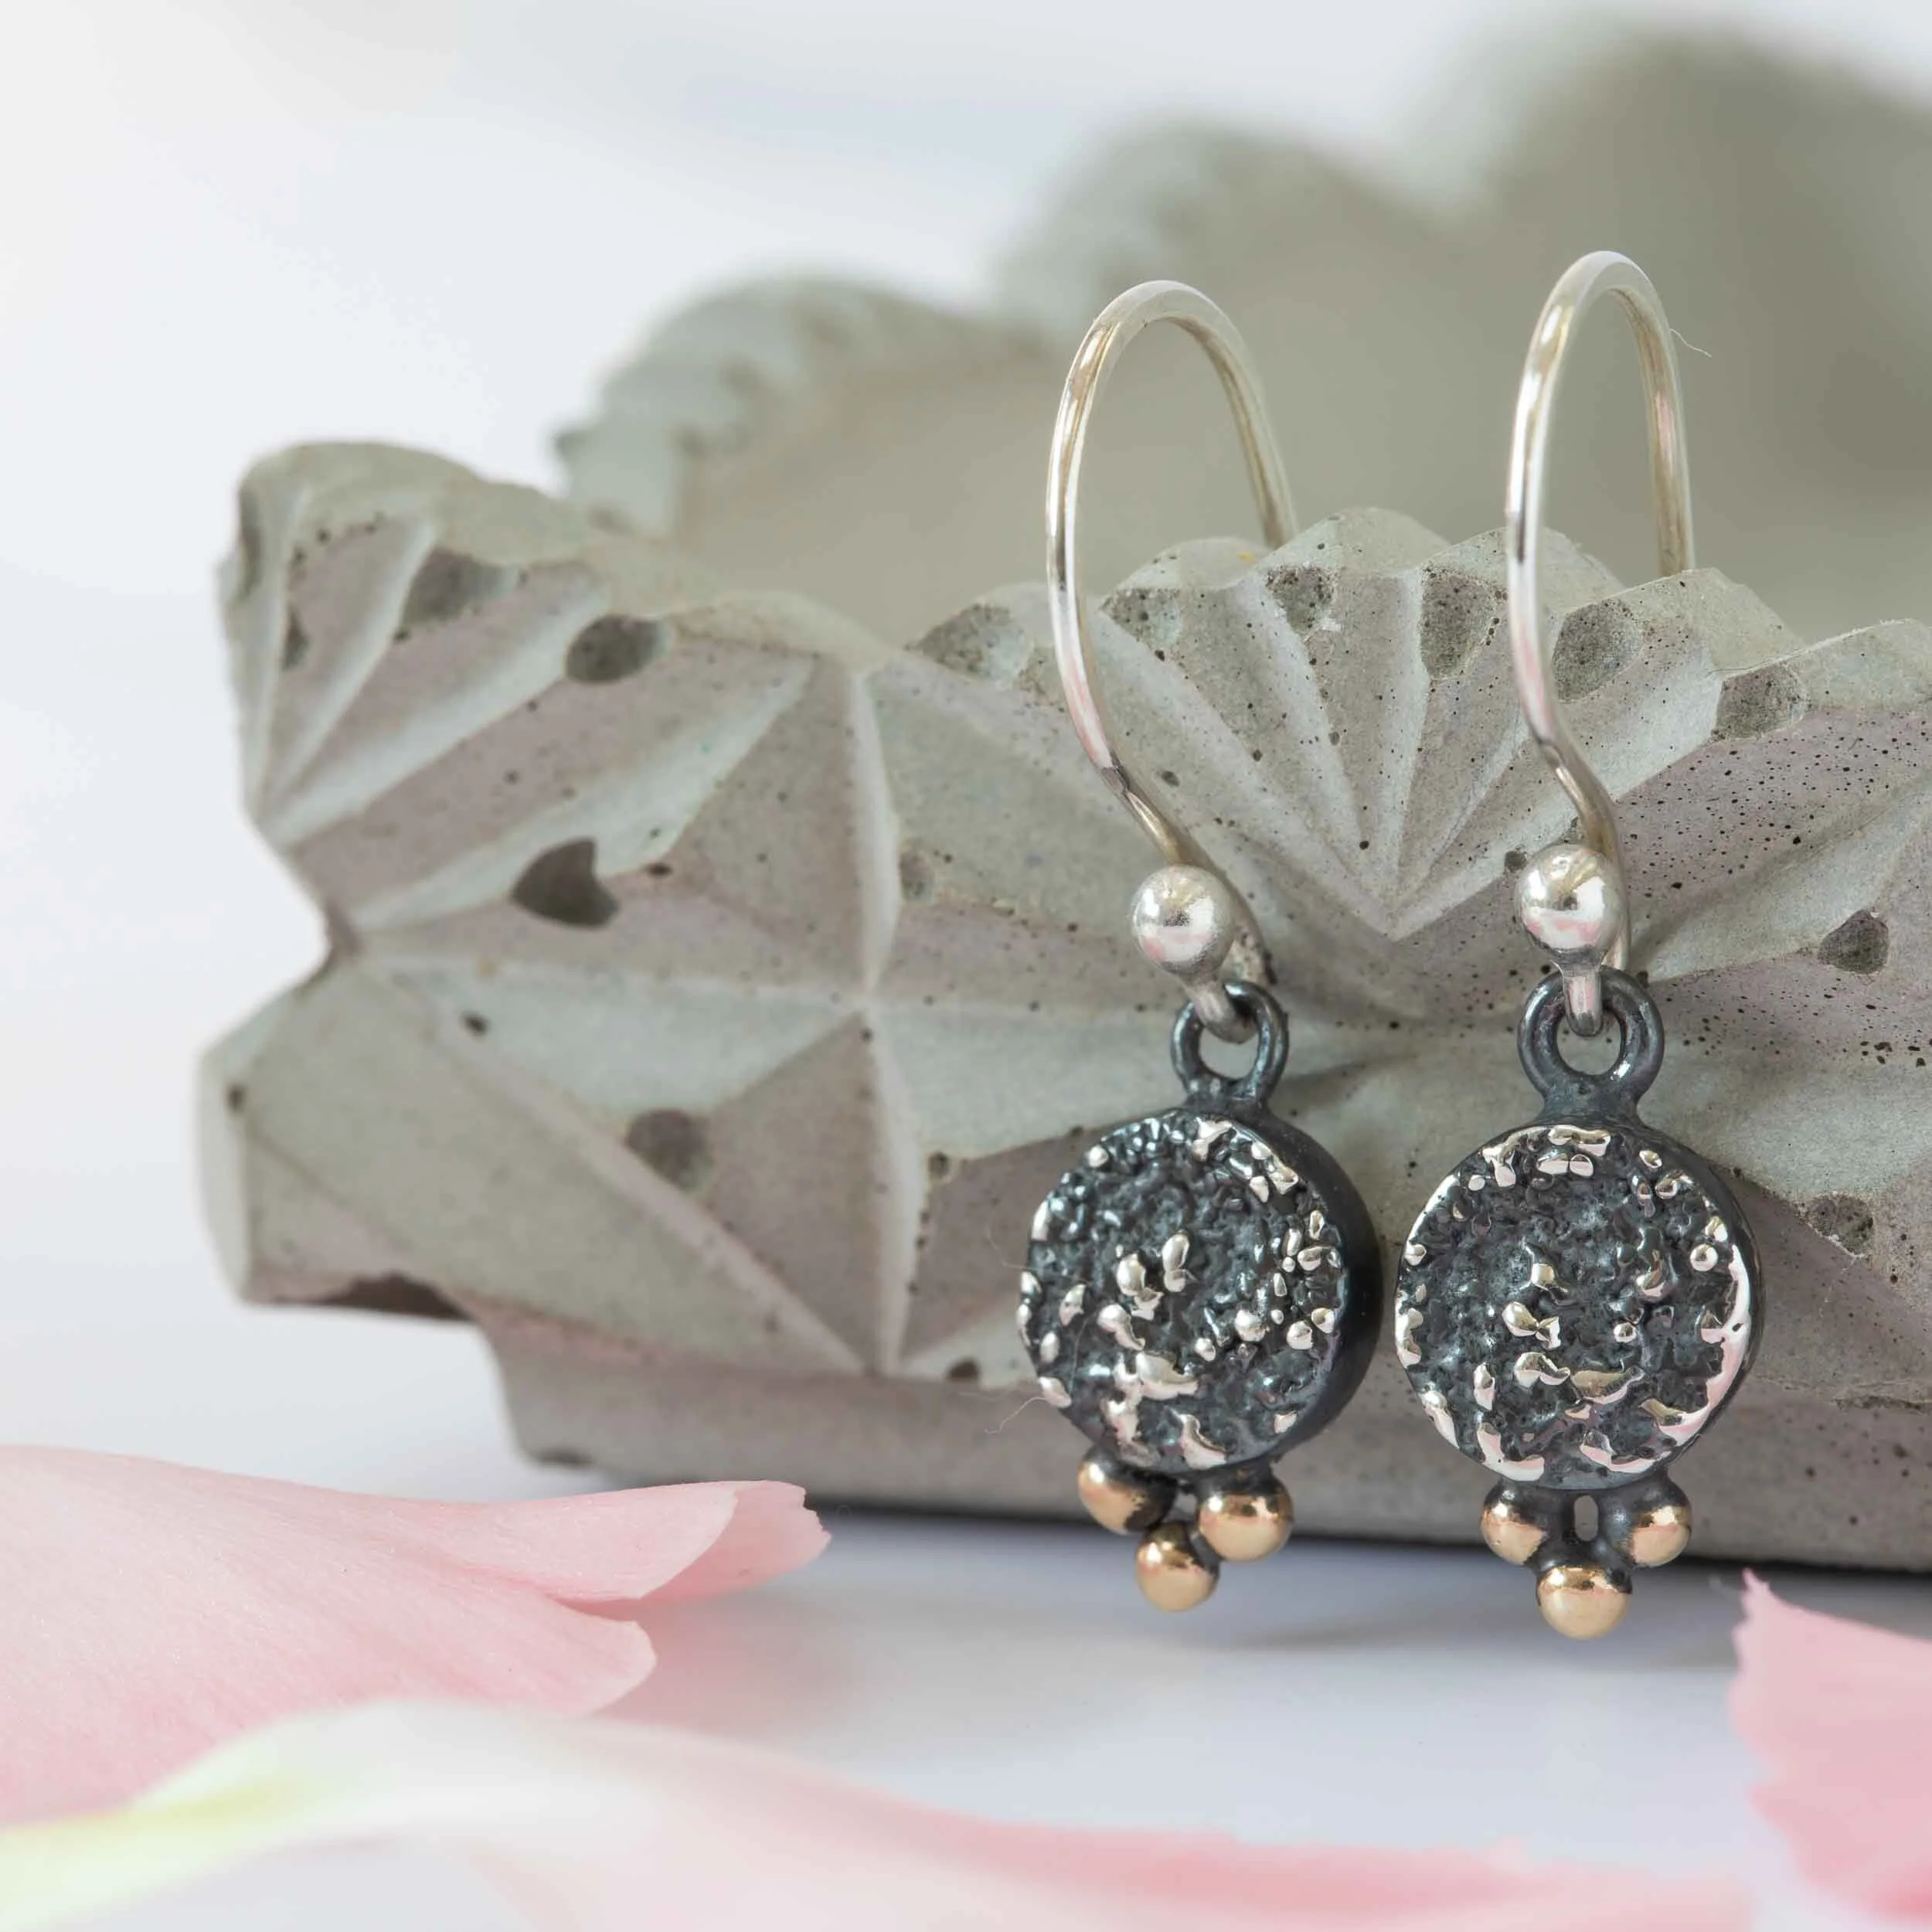
In the example above with the daisy earrings, the image on the plain background is a good enough image, but it just lacks a little something compared to the image on the right which has a subtle texture in the background. It makes the product pop and look more expensive and high end.
3. Layers
Now this is my absolute favourite of all the Styling Building Blocks! Layers! Quite often, if you think that something is missing when you view an image but you can’t quite put your finger on it, the image is missing layers which add height and interest.
A layer is the number of elements that you have as part of your composition, that are layered on top of each other, excluding your jewellery.
So why are layers so important?
Layers create depth and add dimension and interest for the viewer to explore
Layers help to create a premium element. They can take your image to the next level and add complexity which transforms your image
Try to use 2-4 layers (excluding the jewellery) as a guide
Layers can be subtle and minimal. They should always add to your story and not distract or become too busy and overwhelming.

A lightly styled example of layers
Ring by Karen Young Jewellery

A more heavily styled example of layers
Earrings by Jenn Duval of Moodichic
The image on the left is lightly styled and has 3 layers - the background (barely in view, the marble tile and the snow).
The image on the right is more heavily styled and has 5 layers - the background, the marble tile, the peony petals, the green foliage and the peony flower.
Both images work - it is merely a styling decision on whether you want a simply styled image, or a more romantic and more heavily styled image. This will very much depend on your brand.

Image with minimal layers (Background and the Flower)

Image with more layers (Background, Tile, Peony Petals and Peony Flower).
The image with more layers is a lot more visually pleasing through the combination of the building blocks of styling and the composition tools that we learned in Part 1.
4. Colour
And the final building block of Photo Styling is Colour. This is the element that really brings everything together and where your branding and brand colour palette come to life.

When choosing your colour palette, you can either choose Analogous Colours or Complimentary Colours. Analogous Colours are shades that sit beside one another on the colour wheel. Complimentary Colours are those opposite one another on the colour wheel. If you are a romantic brand you may want to stick with analogous colours that sit in harmony beside one another, for example.
It is also important to think about colour in terms of tone - light and airy, rustic and organic, bright and colourful or bold and dramatic. This will very much depend on your brand and the feeling you want to create in the hearts and minds of your customers. I like to group colour tones as follows:


If you have had a graphic designer create your logo and branding then they are likely to have created a colour palette for you, but if you don’t get have a brand colour palette, pick a main colour and tone that reflects your brand.
I recommend picking 1-2 analogous colours and 1 complimentary colour when you are starting to build colour into your styling.

Image using analogous colours (colours that sit beside one another on the colour wheel).

Image using 2 x analogous colours (pink and fushia) and 1 complimentary colour (green).
Again, both images work - it really does depend on the brand aesthetic you want to go for. But I do think that the image with the complimentary colour does have a bit more oomf to it!
Putting It All Together
So how do you put it all together? These are the key decisions I make when styling photos:
I pick my image goal and aspect ratio
I choose the composition tool(s) I am going to use
I consider lines and shapes and use props and composition to create these
I choose 1-2 textures
I use 2-4 layers
I use 2-4 colours MAX
I use 2-5 props generally in total (with the exception of flatlays where you can incorporate more items into your composition). Some of these props will form part of your texture building block and some of these will form part of your layers.
Typically, for my own jewellery brand, this will involve a background (I like to use either marble or speckled concrete for my backgrounds which add a hint of texture, a book or a tile to add height, some petals, gemstones and/ or ribbon as props.

Example of my typical styling for my own Jewellery Brand. Note the light and airy colour palette using analogous colours.
Simply decide on how styled you want your photos to be to guide you in terms of the number of elements you use in your styling. Then you know exactly how many of everything you need and you can start prop shopping! By doing it this way you can become much more intentional with your prop purchases as you know exactly how you are going to use each item and won’t be buying things impulsively to see if they will work!
Photo Props and Backgrounds
1.BACKGROUNDS
We can now finally talk about props and backgrounds! The world is your oyster when it comes to backgrounds or backdrops and you can get really creative here. Remember to think colour and texture when it come to backgrounds. Some of my favourite places to source backgrounds from are:
Club Backdrops (Club Backdrops do custom backdrops so if you provide them with a hex code in your brand colours they can create a matching backdrop)!
You could also use papers, wallpaper, flooring, wood, sand, platters and plates, metal, slate, tiles - remember to think colour, contrast and texture!
And a top tip is to make sure and go for delicately textured backgrounds. Jewellery is small so you don’t want the background to overwhelm it. And it’s worth considering using a contrasting background to the colour of your jewellery. Sterling silver looks beautiful against slate for example as it helps the silver stand out.
2.PHOTO PROPS
I am often asked where I buy props from and the answer is EVERYWHERE! I am always subconsciously on the look out for props. Google is your friend!
Places that I often sources props from include:
Supermarkets - their homeware section often has a great selection of low priced items
Local Antiques Markets
Handmade ceramics and artists
Again think colour, layers and texture when it comes to props.
And think about props that are relevant to your brand and make sure they make sense. Whilst velvet boxes, linen or silk might work for brands with a romantic and classic style of jewellery, if your style of jewellery is more organic and rustic then perhaps wood, concrete or more natural items would make more sense to your target audience. Styling should always make sense to your audience otherwise you risk confusing them. For example I never style my rustic eclipse range with my velvet boxes as the customers who buy my Eclipse range are drawn to a more rugged aesthetic so I use concrete instead. The effect is still on the prettier side, but it isn’t quite as bridal and romantic as the styling some of my other designs.
And finally consider the scale of your props. Don’t go for large items that are enormous compared to the subject you are photographing. Instead of massive vases, think bud vases or tea cups, ring dishes or small side plates.
Great ideas for props include:
Books
Crystals
Flowers & Foliage
Driftwood
Ceramics
Pebbles
Linen & Fabric
Jewellery Boxes
Vases
Paper
Newspaper
Tablecloths
Tiles
Plinths
Slate
Coasters
Ribbons
Shells
I like to create styling inspiration boards using Pinterest or Collections on Instagram.
WHAT SHOULD YOU BUY FOR PHOTO STYLING?
A rough guide, my styling shopping list would include:
1-3 backgrounds
2-4 layers
1-3 textures
2-4 colours (4 max). 2-3 x anagolous and 1 x complimentary colours.
I like to curate 2-3 styling setups for each brand. This means that the styling all works together, but your photos aren’t all the same on your Instagram Feed or Facebook Page which keeps your followers interested.
When curating your collection(s), think about...
What props make sense and what is relevant to your image goal/ product and ideal customer
Your colour palette
Complimentary sizes for your jewellery
A variety of shapes
Texture & patterns
Height for layering
Building your brand visual styling ‘recipe’
So to put it all together to create a visual styling ‘recipe’ for your Brand, simply follow the steps below:
Pick your image goal and aspect ratio
Choose your composition tool(s) and use them to place your props and jewellery in the frame
Consider lines and shapes - use your props and composition to create these
Choose 1-2 textures, 2-4 layers and 2-4 colours MAX for a complex and visually pleasing image
Then curate your prop collection of totally on-brand items that will help make your jewellery shine and will appeal to your ideal customer.
By following this process it means that not only are your images ‘on-brand’ but they are visually pleasing, flow well and emphasise and highlight your beautiful jewellery, which is ultimately what you want when selling online.
We would love to see how you put this into practice so do tag us in any images you take using these techniques so we can support you.
And if you want to learn more about jewellery photography, we have a comprehensive online course in jewellery photography that teaches you to take professional quality images of your work from home or your studio. It starts from the very beginning about how to use the camera and covers white background, model and styled photography.

ABOUT KAREN YOUNG
Karen is a handmade jeweller based in London, who handcrafts silver and gemstone jewellery with meaning, heart and soul (and a little bit of sparkle)! Her designs are heavily inspired by texture and form in the natural world.
Karen also recently started offering remote styled product photography for other handmade business owners. Karen passionately believes that all handmade artists deserve sharp, well-lit photos of their beautiful handmade designs to capture the hearts and minds of your ideal customers so they stand out and sell more online.
Karen Young Jewellery
Instagram: https://www.instagram.com/karenyoungjewellery
Karen Young Photography
www.karenyoungphotography.co.uk
hello@karenyoungphotography.co.uk
Instagram: https://www.instagram.com/karenyoungphotographyuk