
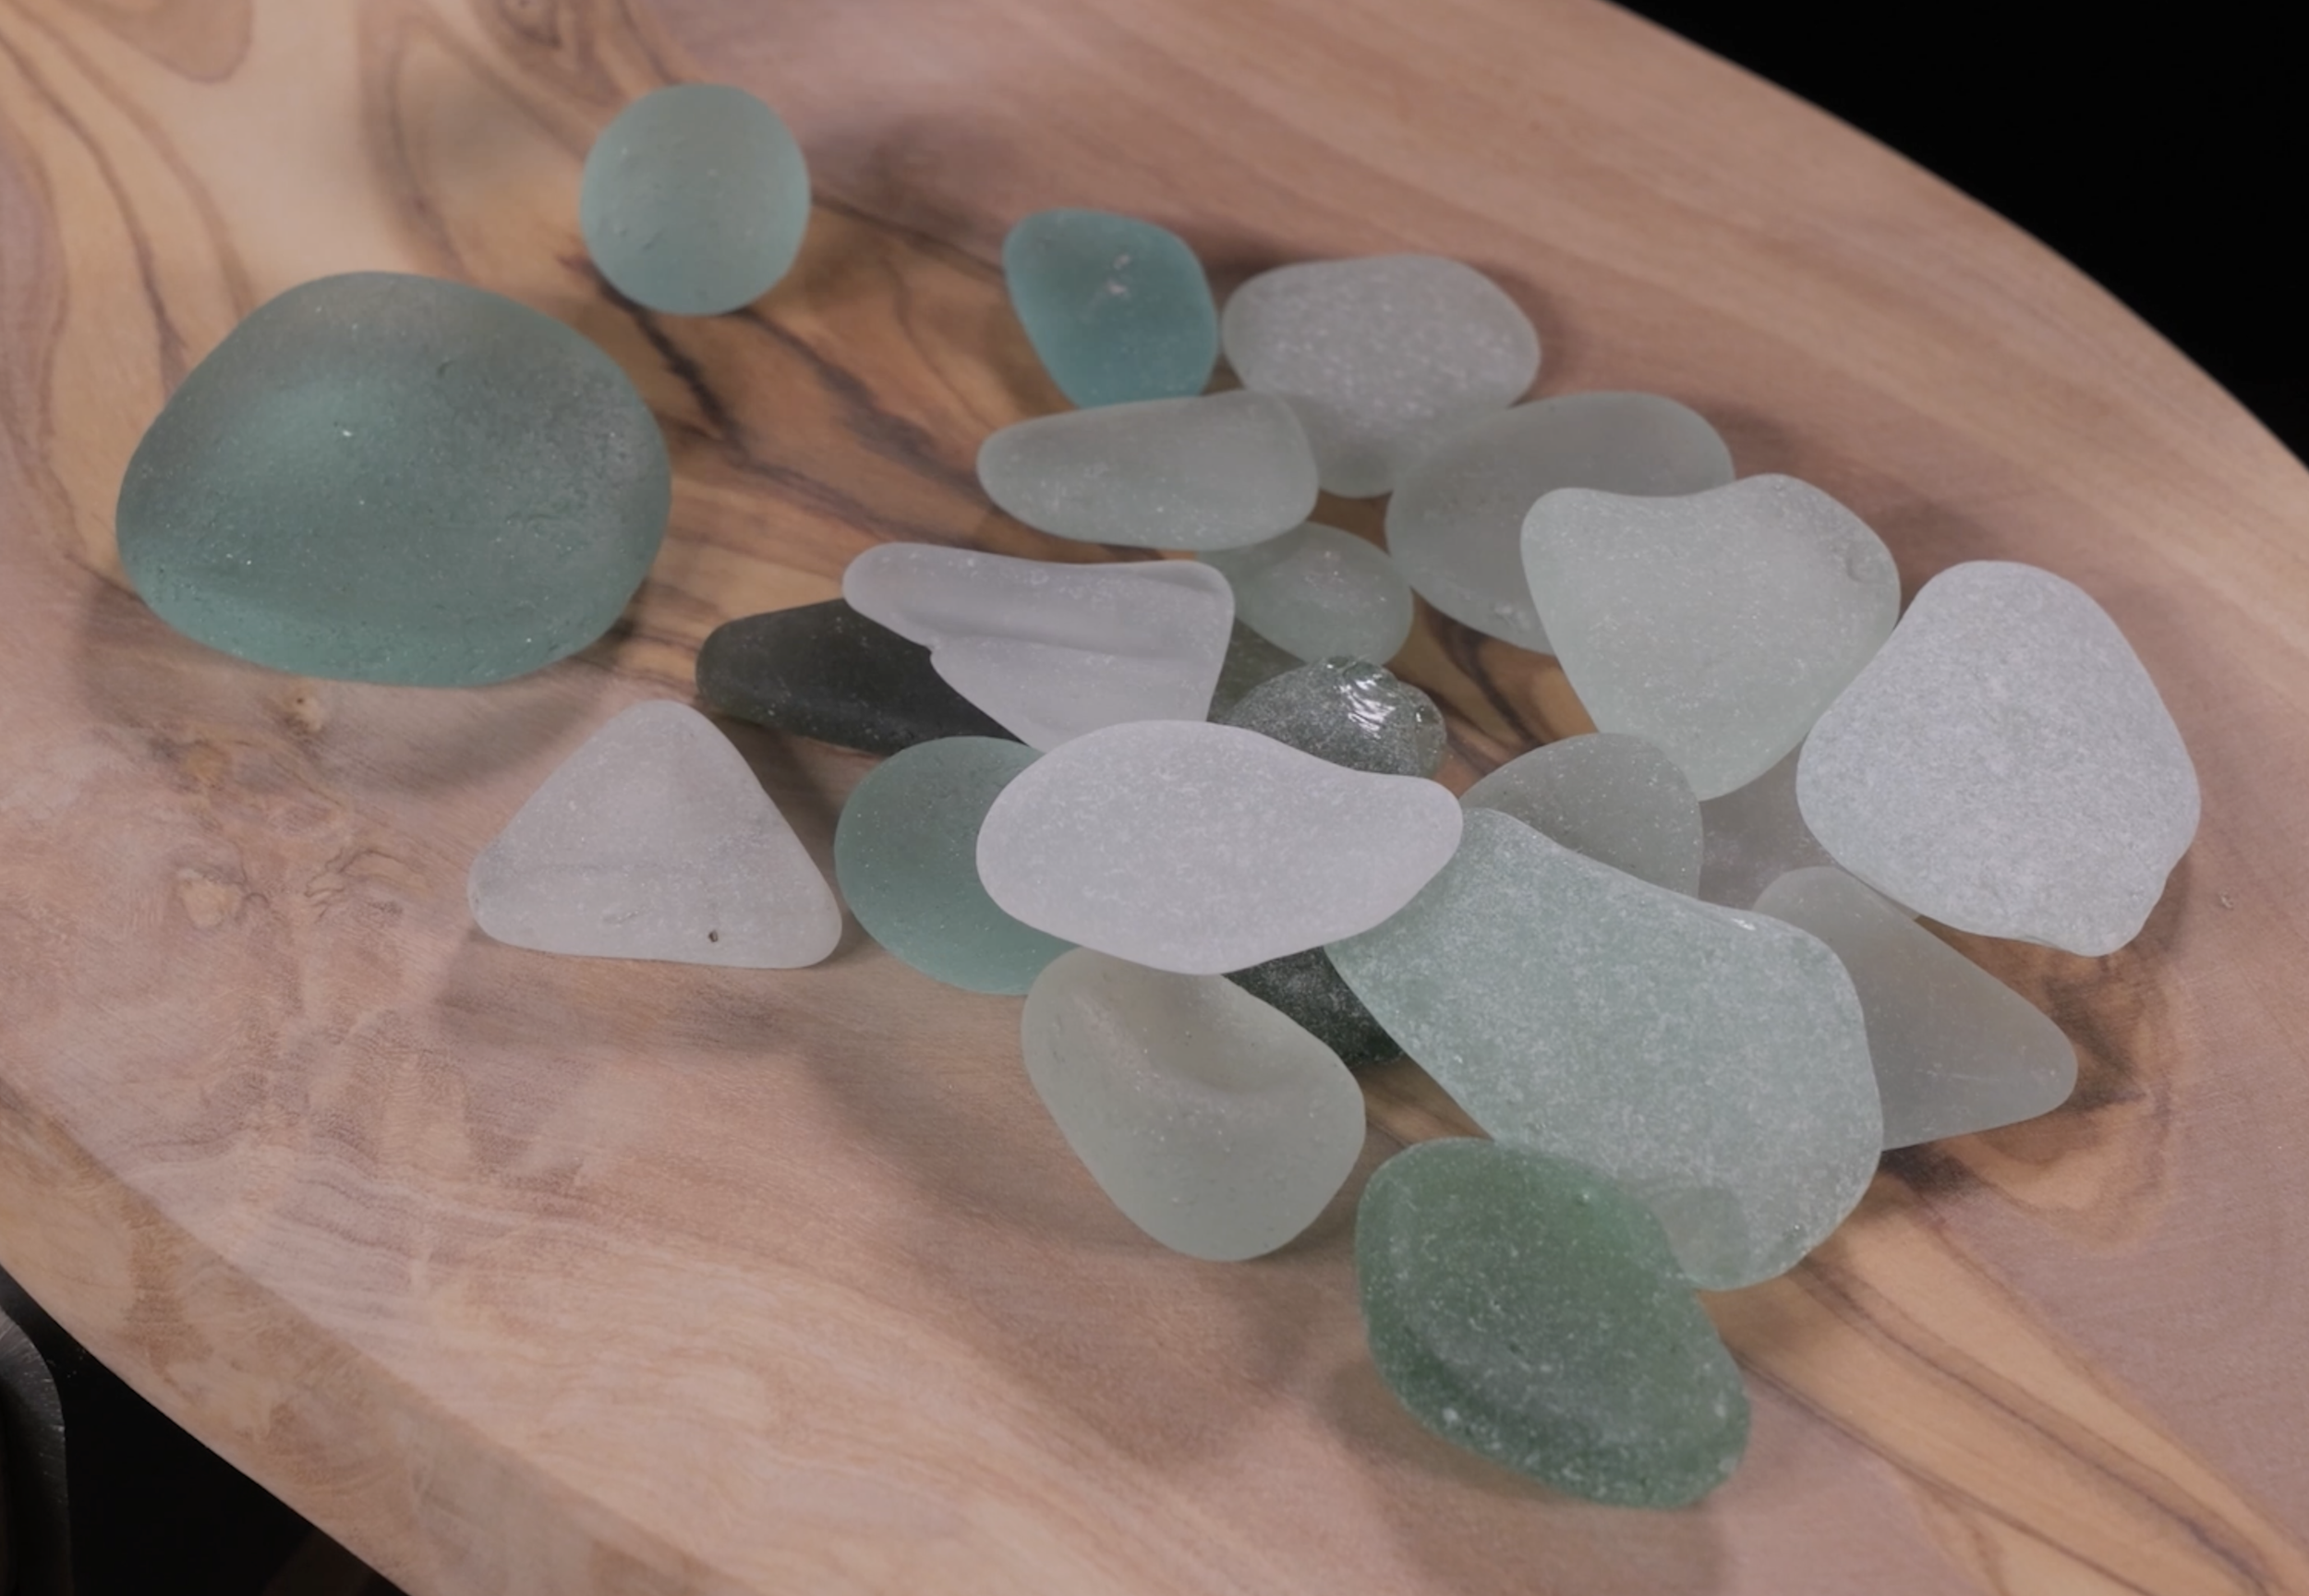
One of the loveliest things about making jewellery with sea glass is that no two pieces are quite the same.
Each has its own shape, thickness, texture and history. That is what makes sea glass so interesting to work with, but it also means you cannot always begin with a fixed design in mind and expect every piece of glass to fit your ideal. Instead, it is often better to start with the glass.
Look closely at the piece you have chosen. Is it thin or thick? Smooth or deeply textured? Does it have a reasonably regular outline, or is it full of curves and unusual angles?
The answers can help you decide whether to create a bezel setting, hold the glass in claws or drill it and add a bail or jump ring.
Should you bezel set, claw set or drill sea glass?
There is no single best way to set sea glass. The right technique depends on the individual piece and the type of jewellery you want to make.
As a simple starting point:
A bezel setting can work well when the glass has a shape you can closely follow with bezel wire.
A claw setting can be a great option for more irregular pieces that would be difficult to capture with a bezel.
Drilling is often better suited to thinner pieces of glass and can be used to create simple pendants and charms.
Let’s look at each option in more detail.
When should you bezel set sea glass?
A bezel setting surrounds the edge of the sea glass with metal, creating a framed and finished appearance (see example below).
This can be a beautiful way to make a piece of found glass feel precious while still allowing its shape, colour and texture to be the focus of the design.
Before deciding to bezel set a piece, look carefully at its outline and height.
Sea glass is rarely completely even, so you need to make sure the bezel is tall enough to hold the highest parts securely. Standard softened bezel strip may not always be wide enough for a particularly deep or uneven piece. In this case, you may need to cut a wider strip from fine silver sheet.
You should also consider how the base of the glass sits against the backplate. Some pieces may need careful preparation to remove a sharp edge or create a flatter surface before they are set. Sea glass can crack or splinter during shaping, so it needs to be handled carefully and worked with suitable abrasive tools.
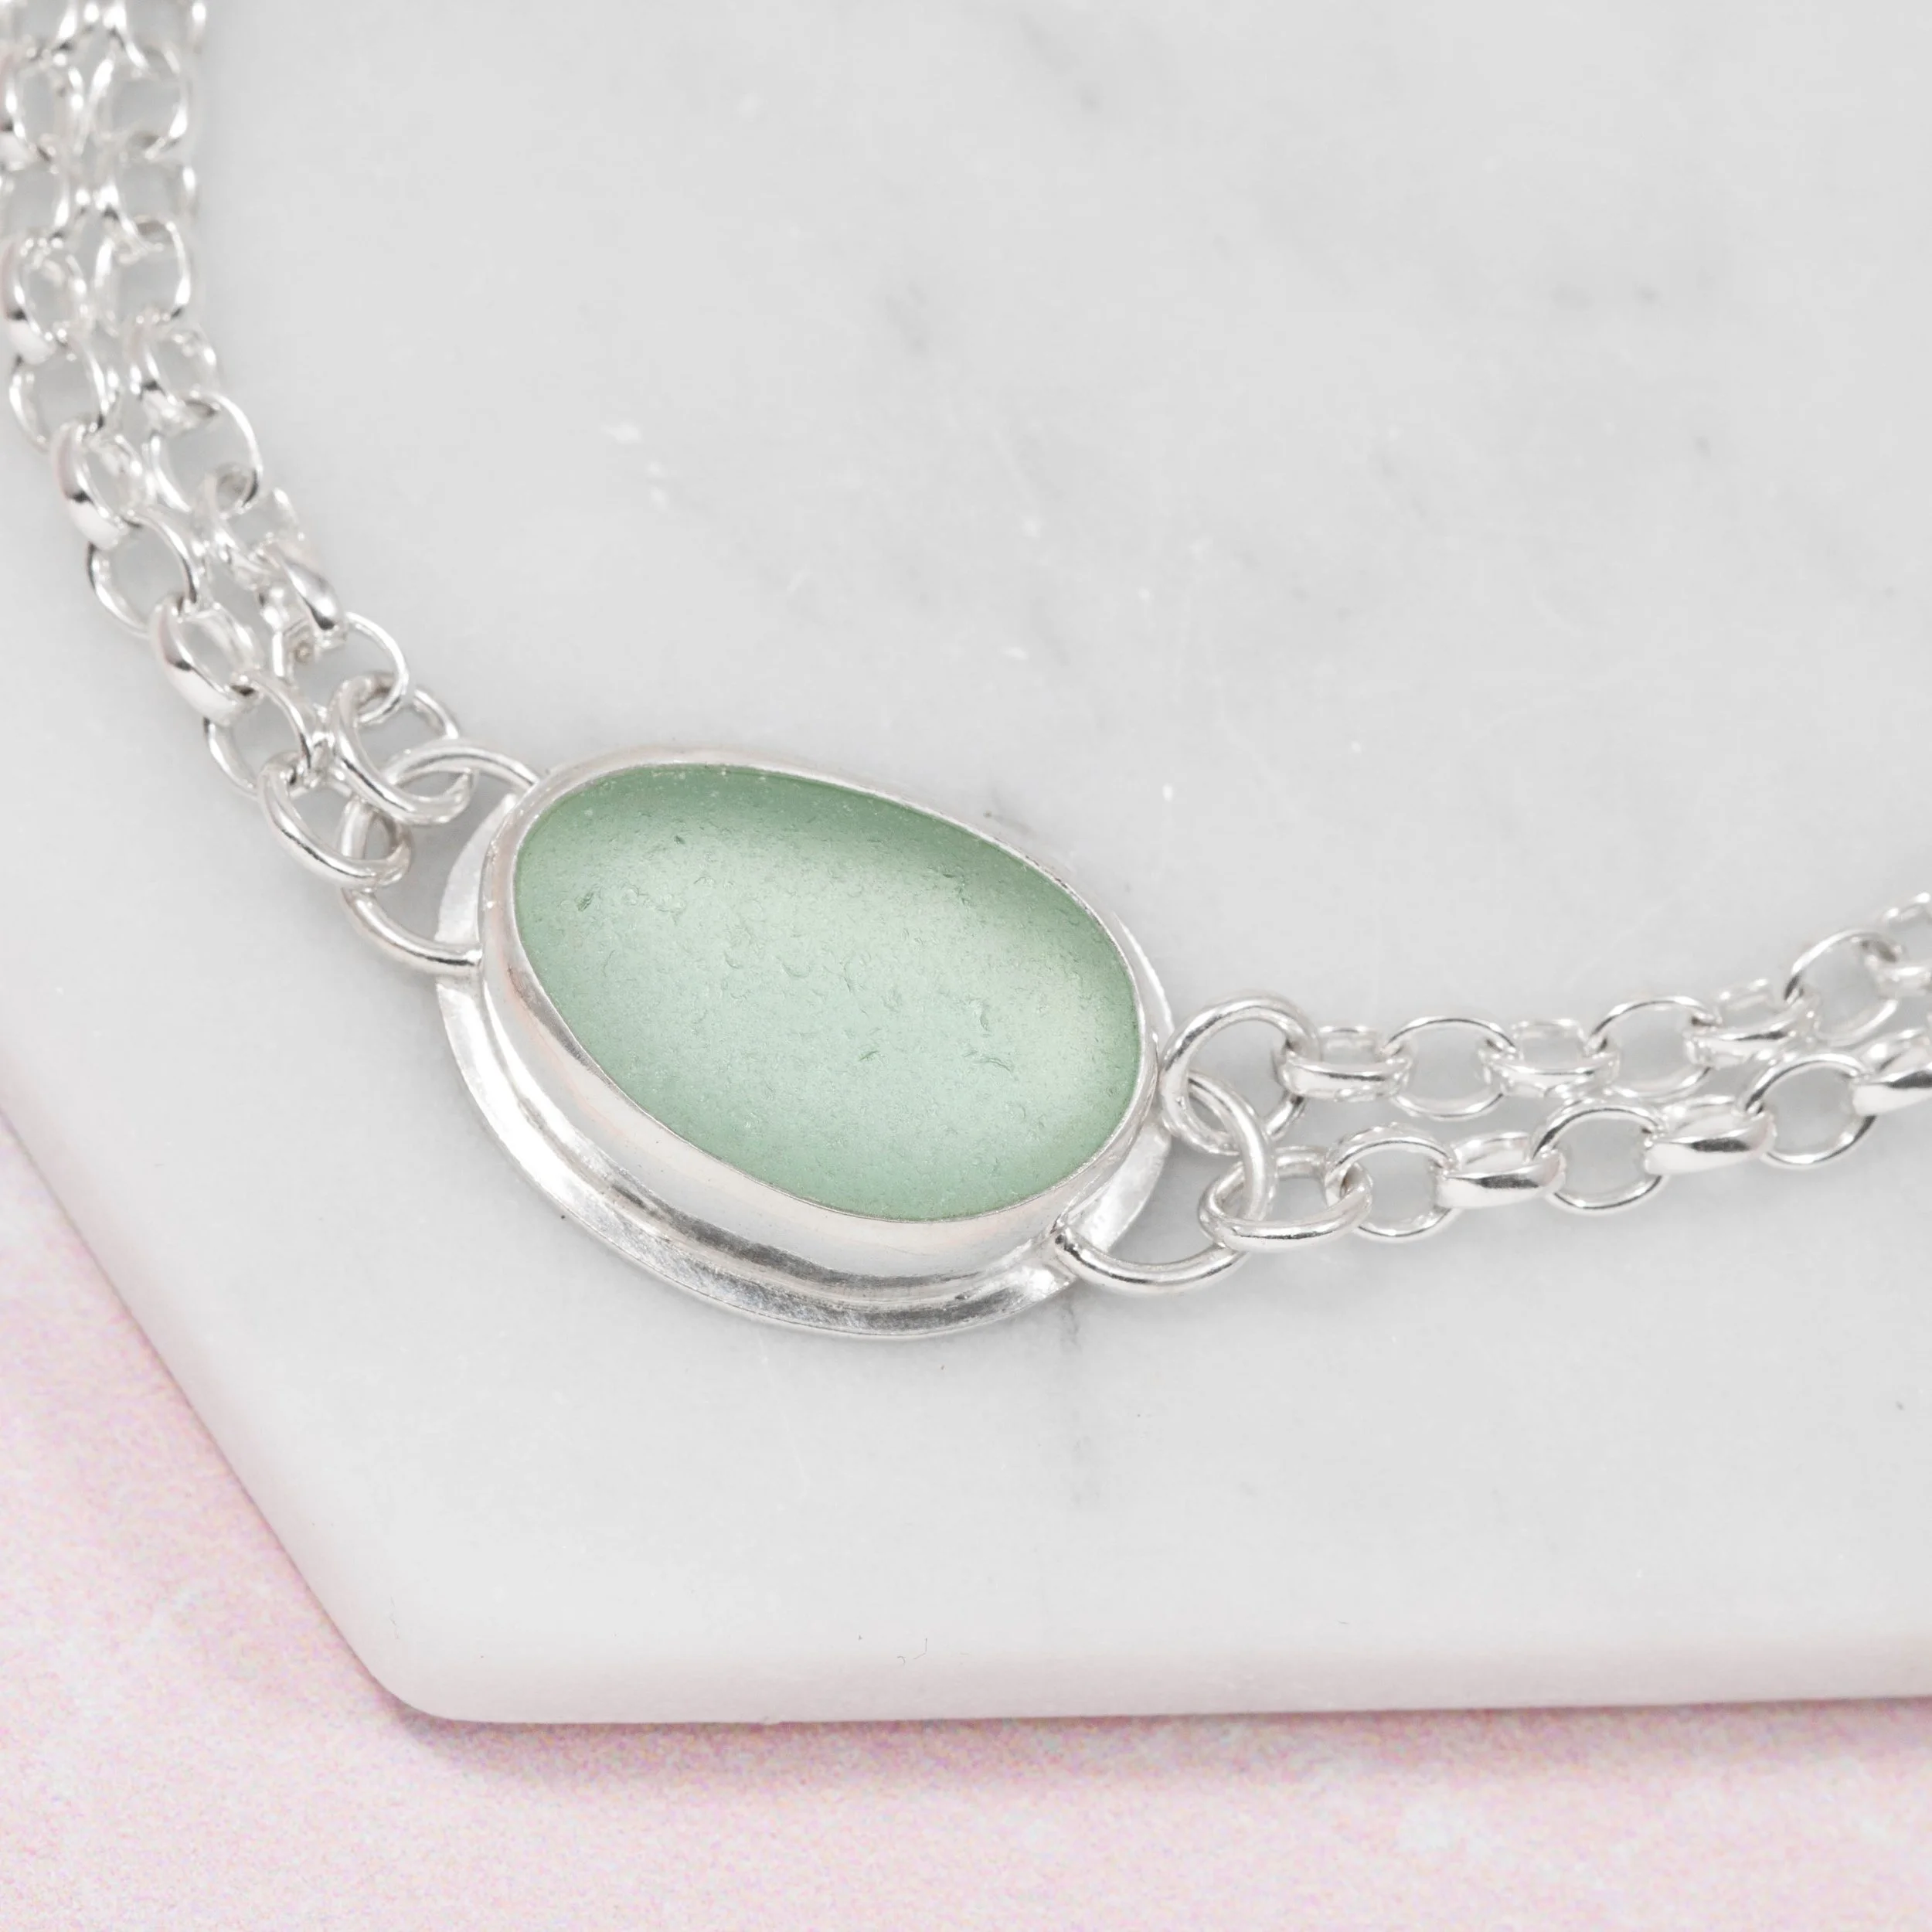
A bezel setting may be right when:
You want the sea glass to have a defined silver frame
The outline can be followed successfully with bezel wire
The bezel can reach high enough to hold the glass securely
You would like to create a substantial pendant, ring or other statement piece
Because some sea glass is translucent, remember that solder marks, tarnish or an untidy finish behind it may remain visible. Take extra care when preparing and finishing the setting so that the metal beneath the glass looks as good as it can.
When should you claw set sea glass?
A claw setting uses individual lengths of wire to hold the sea glass securely (see example below).
This can be a particularly useful option when the shape is too irregular for a traditional bezel. Instead of trying to make one strip of metal follow every curve and angle, you can position the claws around the piece where they will hold it most effectively.
A claw setting can also leave more of the glass visible because the edge is not completely surrounded by metal. This may appeal when you want to celebrate the original shape or allow light to pass through a translucent piece.
However, the placement of the claws needs to be thought through before you start. The claws should work together to keep the glass secure without distracting from the most interesting parts of its shape and texture.
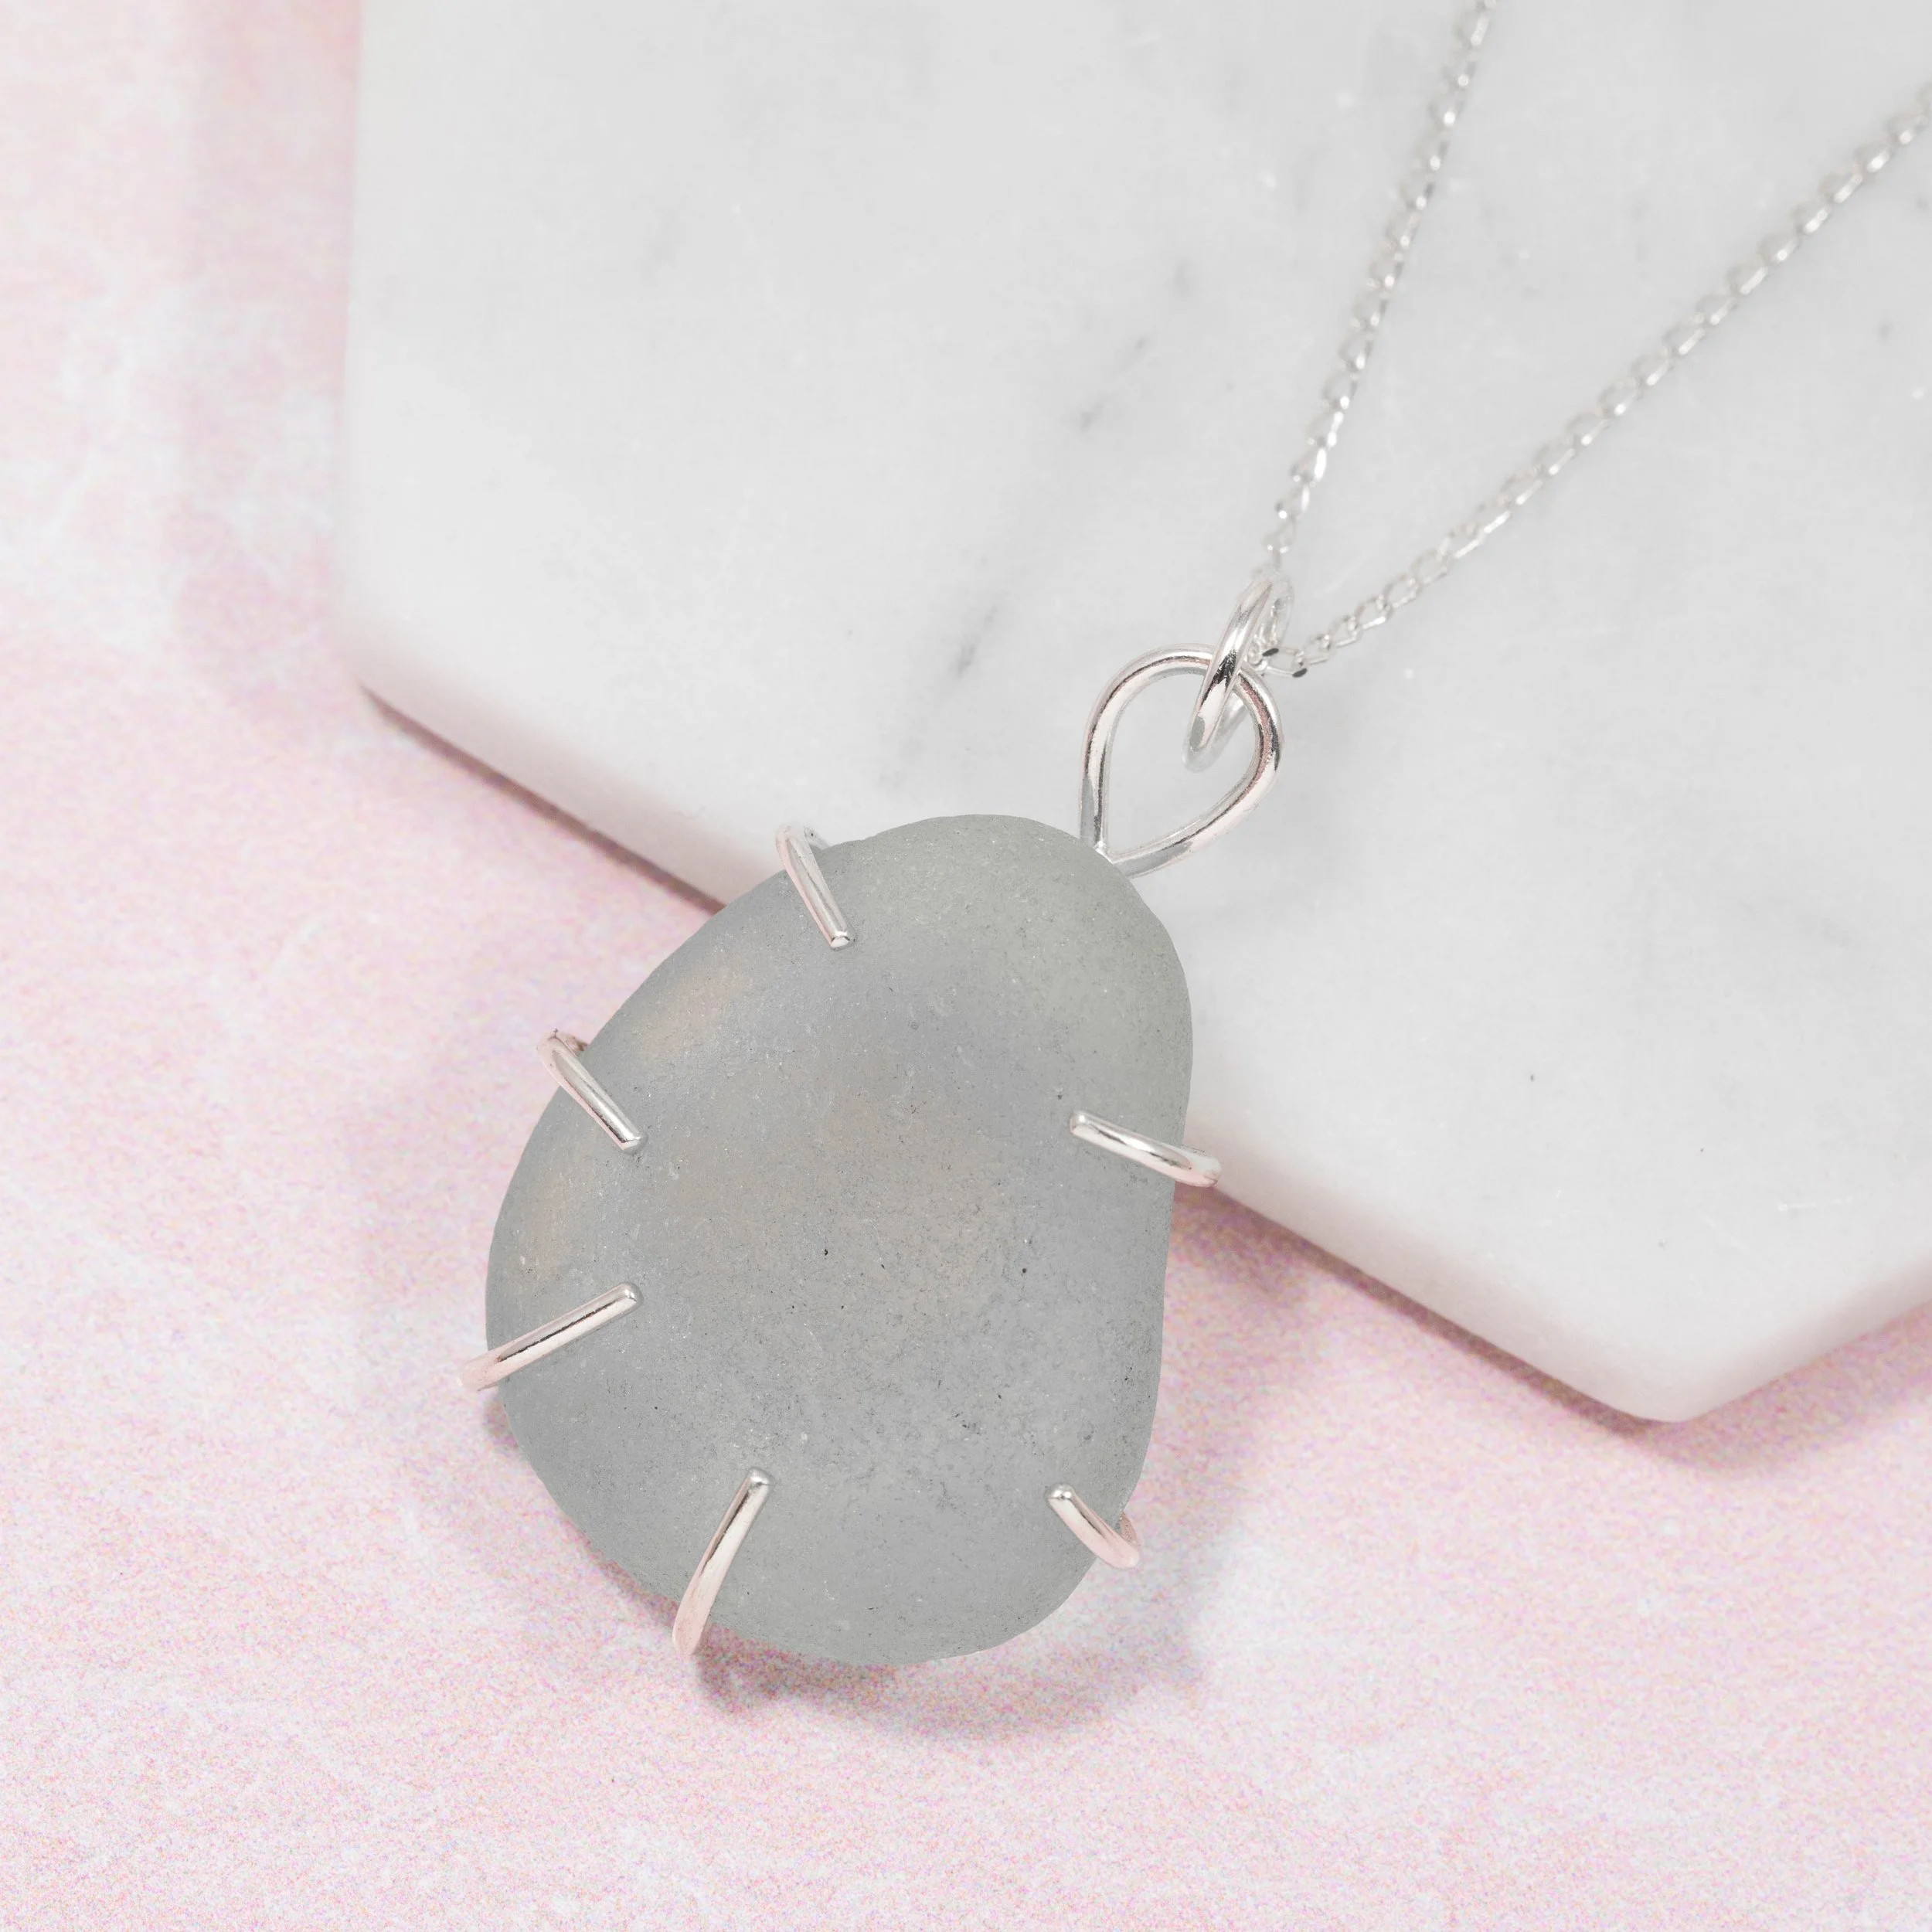
A claw setting may be right when:
The sea glass has an unusual or highly irregular outline
You want more of the edge of the glass to remain visible
A continuous bezel would be difficult to fit securely
The glass has suitable points around which the claws can be positioned
Claw setting does not mean forcing a standard arrangement onto every piece. The number and position of the claws should respond to the individual shape of the glass.
When should you drill sea glass?
Drilling can be one of the simplest-looking ways to turn a piece of sea glass into jewellery.
Once a hole has been drilled, you can add a jump ring or bail to create a pendant or charm without building a complete metal setting around the glass.
Not every piece is suitable for drilling, however.
Thinner sea glass is generally better for drilling than a very thick piece. You also need enough space around the intended hole so that you are not working too close to a fragile edge.
Sea glass should be drilled under water. This helps to keep the glass and drill bit cool and contains the glass dust produced during drilling. Diamond-coated drill bits are used, and the glass should be supported and kept steady while you work.
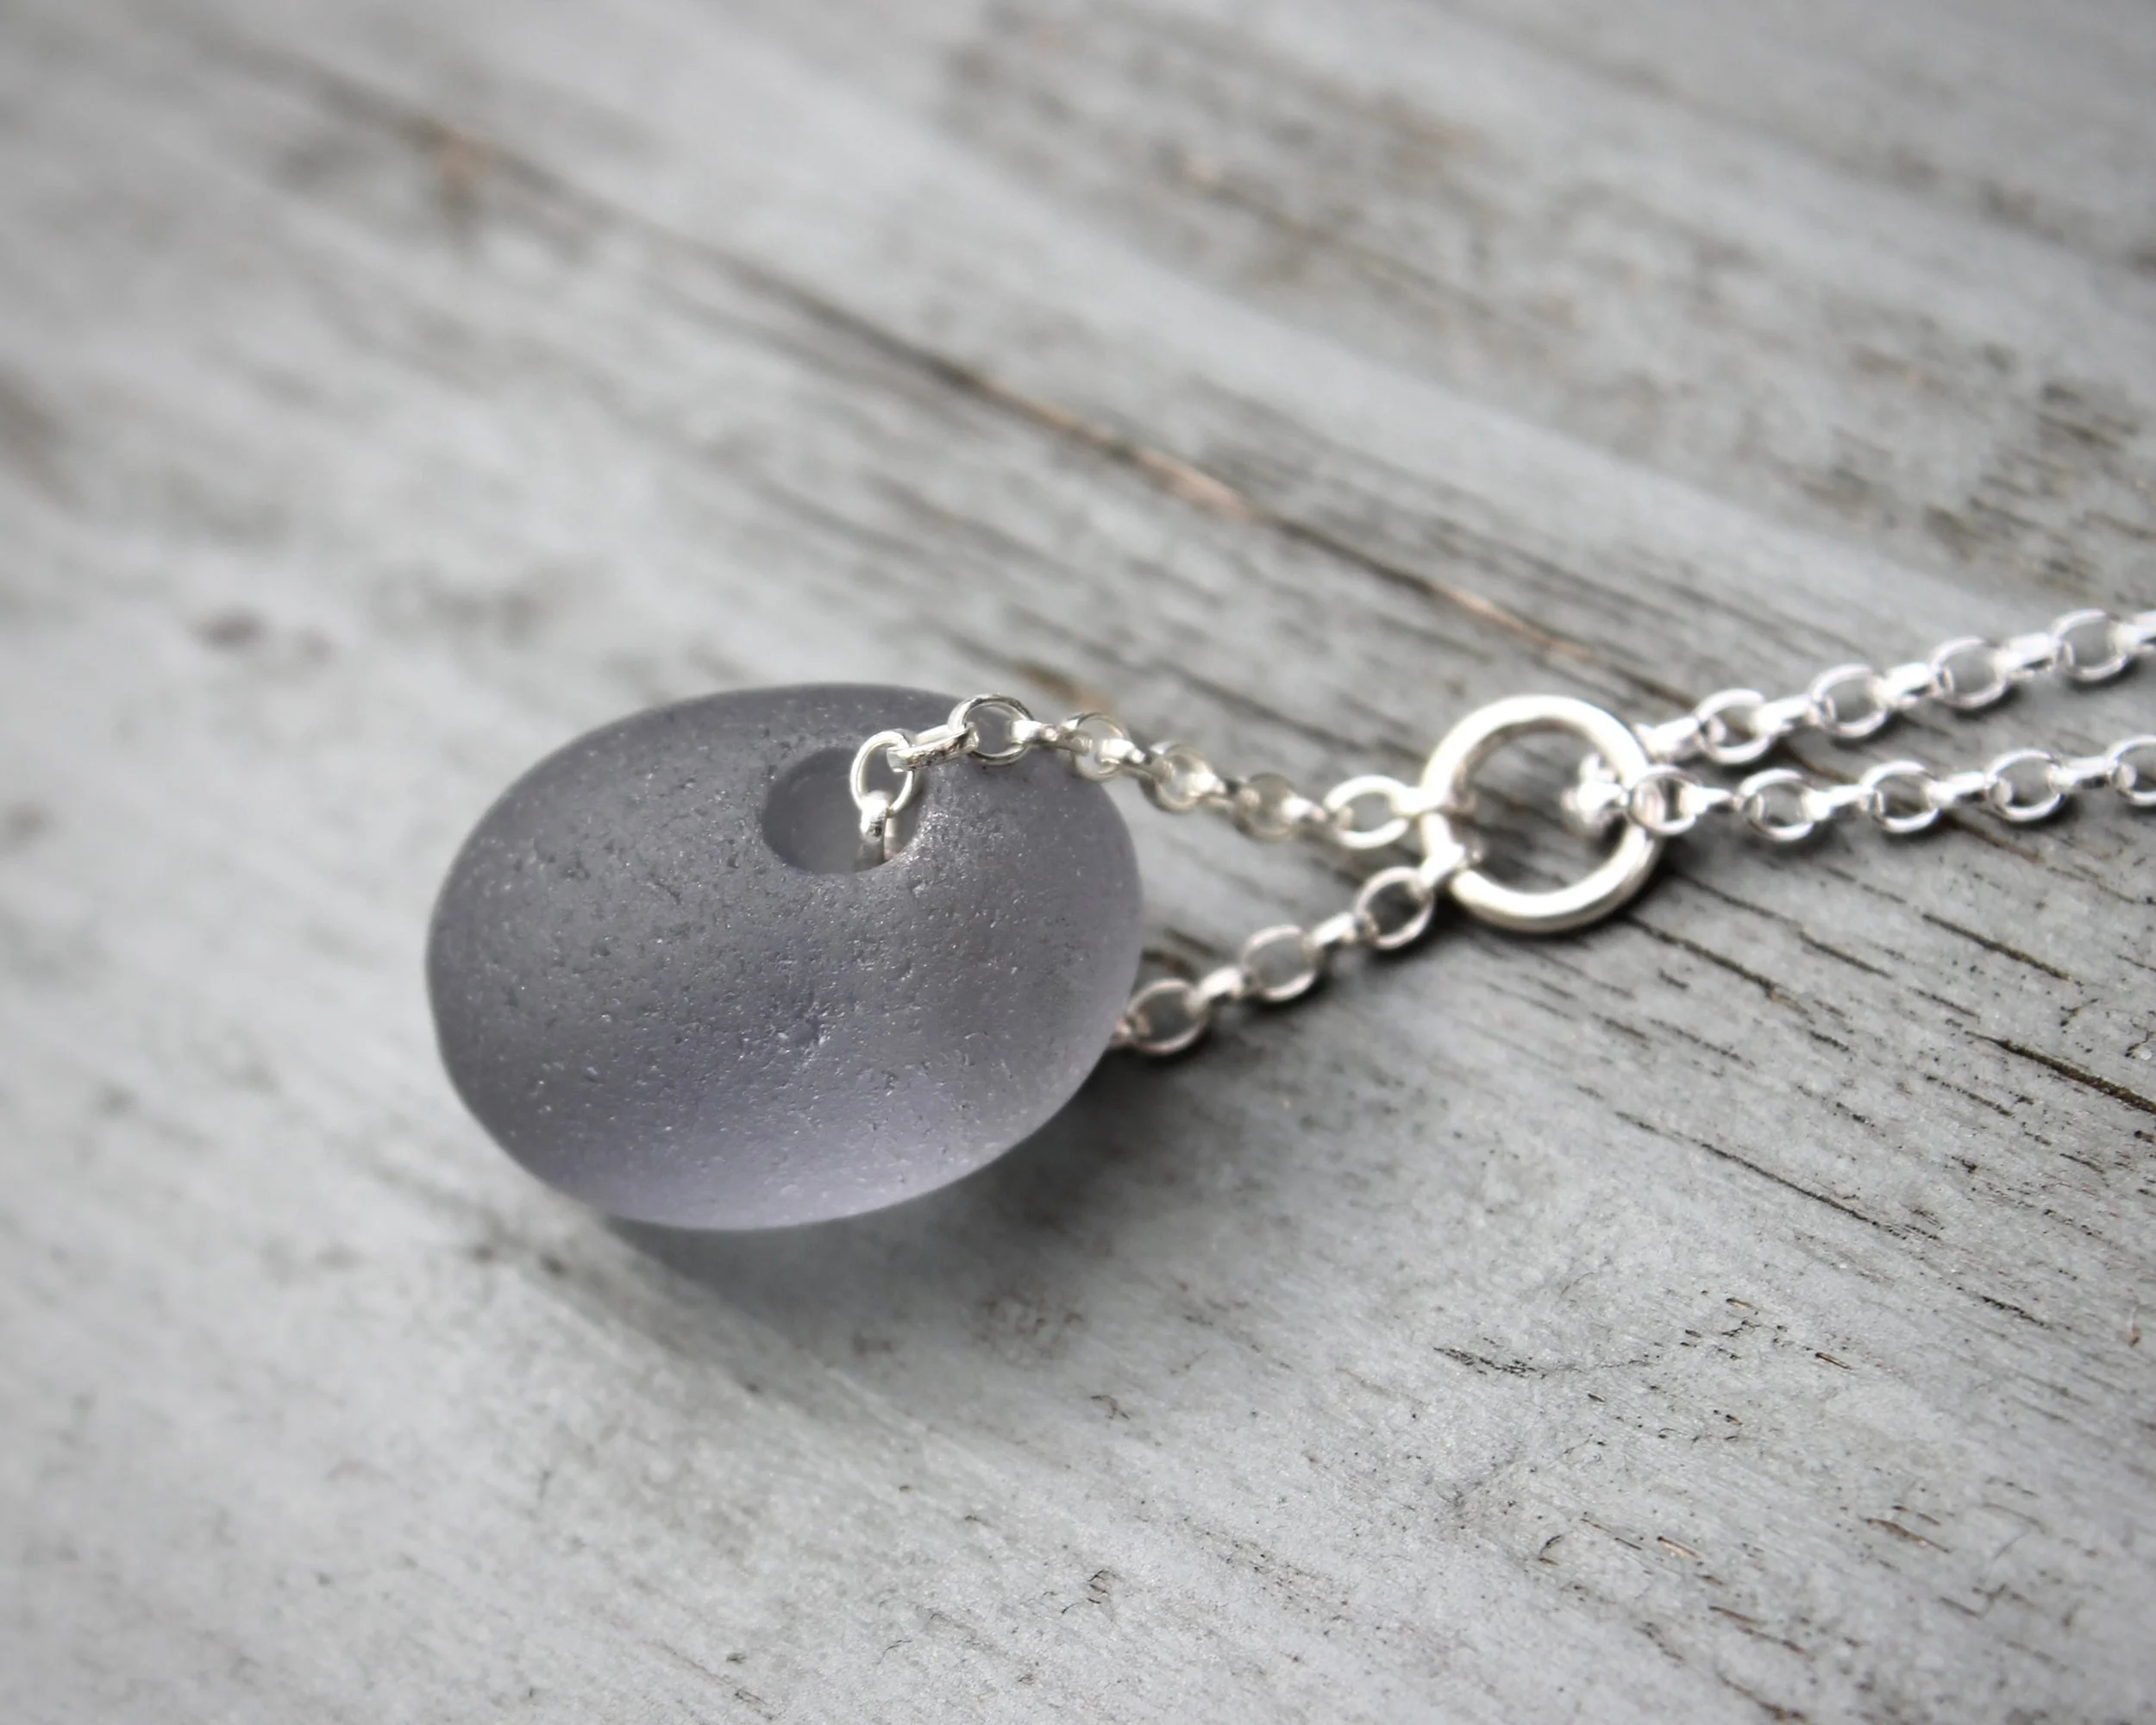
Drilling may be right when:
The sea glass is relatively thin
You want to make a simple pendant or charm
You would prefer not to surround the glass with a metal setting
There is a suitable area for the hole away from fragile edges
The natural shape of the glass already works well as a hanging piece
It is important not to rush this process. Too much pressure or heat can damage the glass, and even a promising piece may crack if it is not drilled carefully.
Let the sea glass lead the design
It is easy to begin with an idea such as I want to make a bezel-set pendant and then search for a piece of sea glass that will cooperate.
Sometimes that works.
But sea glass often gives you more interesting possibilities when you allow the material to influence the design.
Before choosing your setting, ask yourself:
How thick is this piece?
Does it have any cracks, chips or particularly fragile areas?
Is the base suitable for sitting against a backplate?
Can bezel wire follow the outline effectively?
Where could claws be positioned to hold it securely?
Is there enough space to drill a hole safely?
Which parts of the glass do I most want to keep visible?
Will the finished piece hang or sit in the way I intend?
You may find that the piece you imagined in a bezel would look better held in claws. A small, thin fragment might be perfect for drilling, while a more substantial piece could become the centre of a statement design.
The setting should not simply hold the sea glass. It should help you show what is interesting about it.
Do you need to collect your own sea glass?
You do not have to live near the coast or find every piece yourself to make sea glass jewellery.
Natural sea glass and man-made tumbled glass can both be sourced online. Man-made glass is often smoother and available in a wider choice of colours, while natural sea glass may have small pits, inclusions and a more weathered texture.
Sea Glass course tutor Kelly Twigg recommends that beginners consider practising with man-made tumbled glass because its consistency can make it easier to work with while learning the techniques.
The bezel and claw techniques used for sea glass can also be adapted for other found objects, including pieces of sea pottery and suitable pebbles.
Learn how to bezel set, claw set and drill sea glass
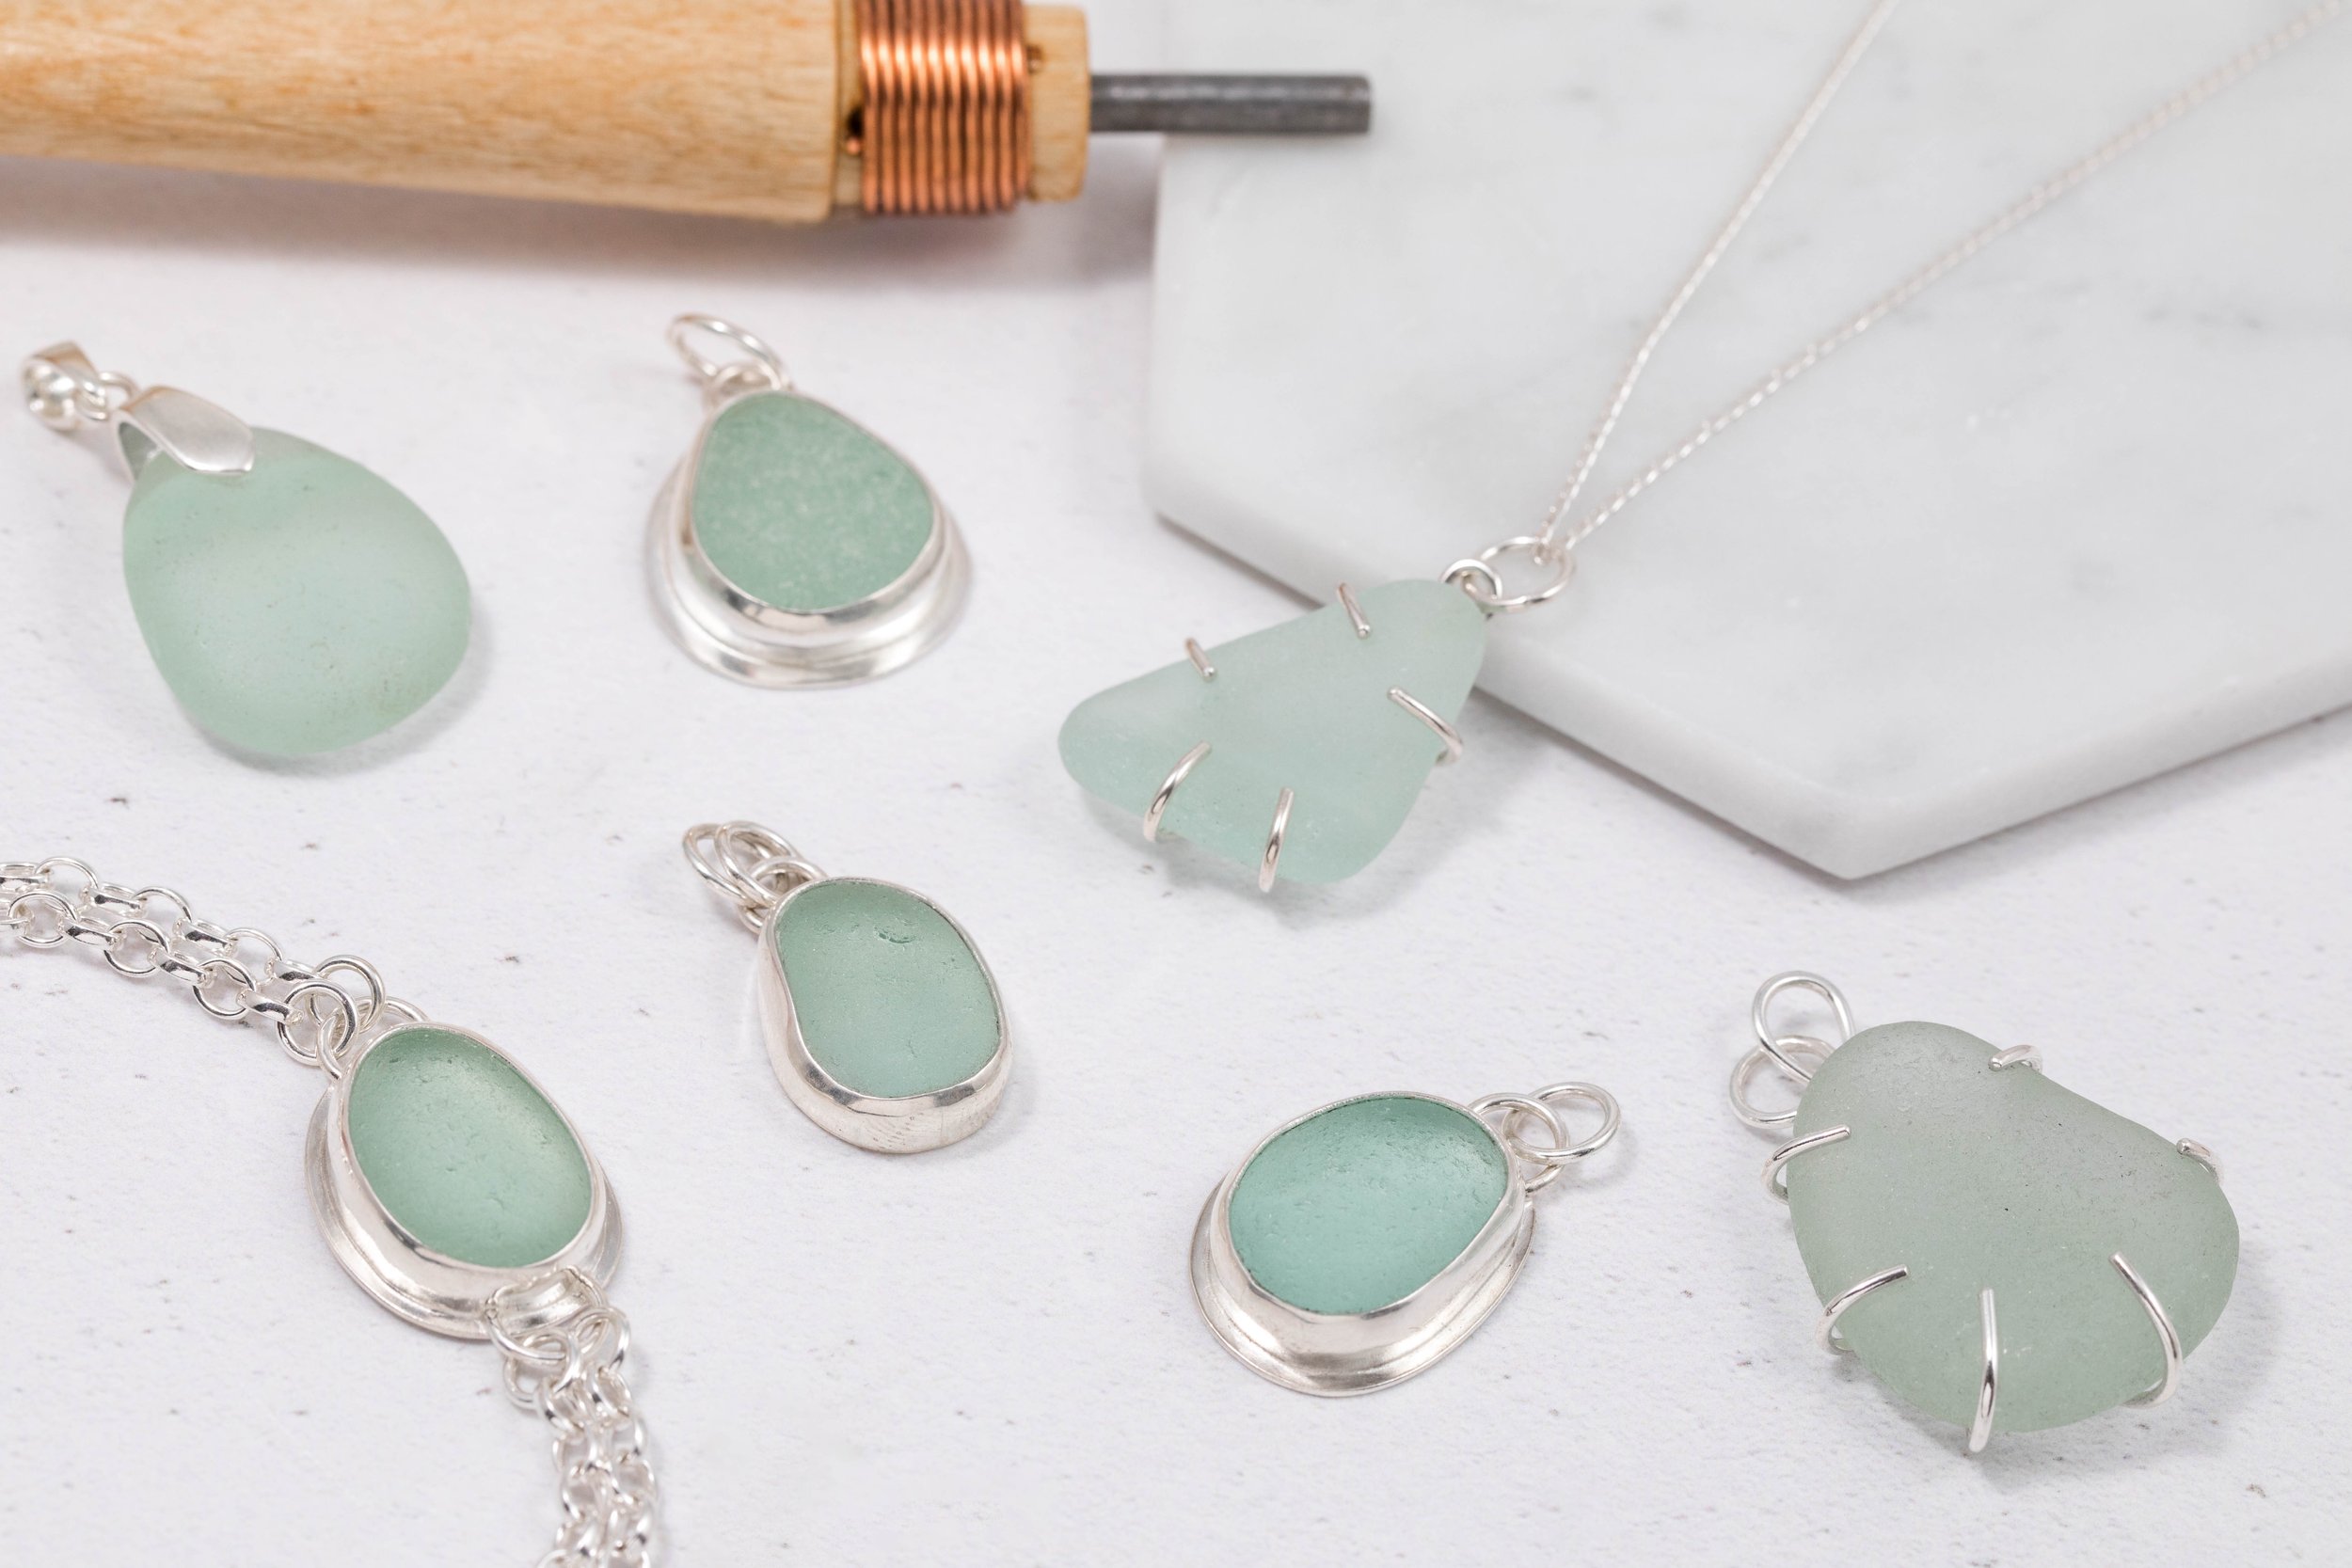
In the Jewellers Academy Sea Glass Jewellery online course, Kelly Twigg teaches you how to select, prepare and shape your sea glass before transforming it into jewellery in three different ways.
You will learn how to:
Create and securely finish a bezel setting
Make a claw setting suited to an irregular piece
Drill sea glass safely
Add a bail to your design
Adapt the techniques for different shapes and found materials
The course includes comprehensive video lessons, downloadable notes, a full tools and materials list and ongoing access, so you can pause, rewind and revisit each technique as you work. It is designed for intermediate jewellers who already have some experience of soldering and stone setting, particularly bezel setting.
The Sea Glass Jewellery course is currently 50% off until Tuesday 11 August 2026 at 11.59pm UK time.